The art of Neapolitan pizza making made the Unesco’s Intangible Cultural Heritage of Humanity list, but even making a good homemade pizza is no mean feat. Anyway, making pizza at home is one thing, making it into a pizzeria is quite another; the differences concerning the various phases of the process will inevitably affect the end product. Here we will locate them and give you some advice for making pizzeria-quality pizza at home.
What kind of pizza do we talk about here?
Pizza is a staple of home cooking thanks to recipes that back in the day passed down through generations and now are easily found on the Net. But the Web brought about so many infinite variations on dough making, rising times, tools and techniques to use that feeling your way along is extremely difficult. Making pizza is an art not an exact science and even more so at home where the whole process may rapidly turn into a fiasco when you face problems such as the lack of commercial kitchen equipment.
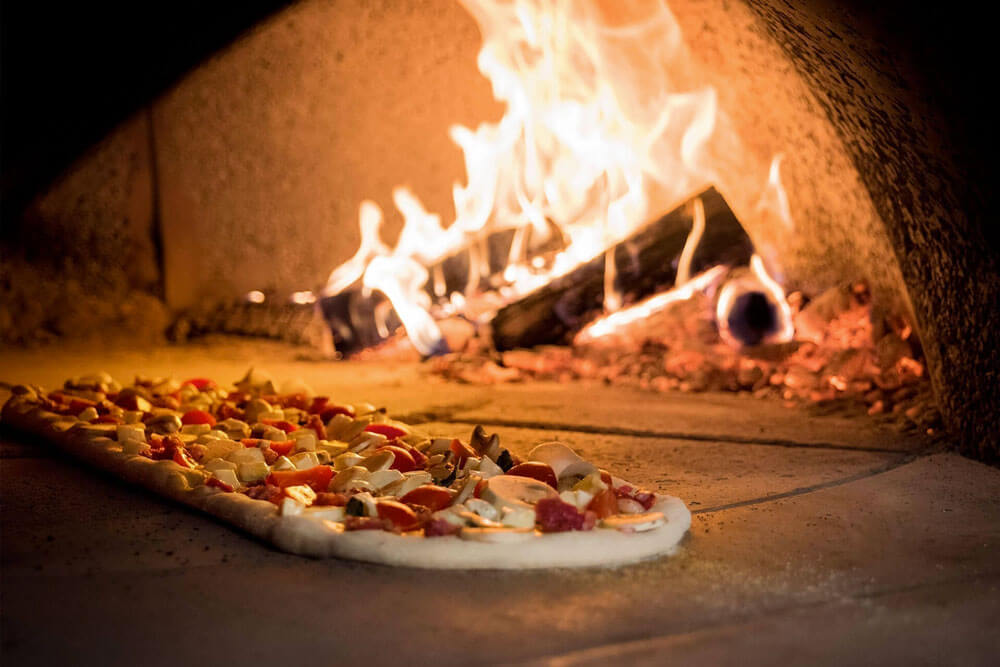
First off, Neapolitan pizza is hand-stretched and cooked in a wood-fired oven without any kind of pan. So, in the absence of a wood-fired oven, we can’t talk about Neapolitan pizza sensu stricto even though that doesn’t prevent you from making delicious pizzas with a gas-fired or electric oven. Now, the question is: what is the best pizza that you can do at home? There are bottomless twists on classic pizza recipes as a result of overwhelming regional diversity of Italian cuisine. A very tasty variant is pan pizza that is everywhere in Italy and is coming on strong worldwide. Between classic pizza and pan pizza there are many differences even though the basic ingredients are about the same. Let’s recap the main points of both:
- Pizza dough is different, especially the hydration percentage that is the amount of water contained in the pizza dough and the presence or absence of ingredients such as sugar or extra virgin olive oil.
- The times and methods for kneading and letting the dough rise are completely different.
- The two need different temperatures and cooking times.
- The way you put toppings on pizza dough (all together or as the baking goes on).
Finally, pan pizza is the way to go for a homemade pizza because it needs lower temperatures while the classic one requires a high-octane oven reaching temperatures of 650°F, far from being achieved by a home oven.
But what are the differences between a home-made pizza and a restaurant pizza?
Let’s now take a look at how you can make a pizzeria-quality pizza at home. Basically, main differences come down to the availability of kitchen tools to help you cook like a chef that can be hard to find in your home kitchen. Three appliances are really indispensable:
- the dough mixer: the biggest pizzerias use about 250 pounds of pizza dough per day and making it by hand is unthinkable whether for reasons of time or practicality. In addition, the frictional energy of the mixer causes the dough to heat and favor its rising. Normally the amount of heat generated by the mixer is reported in the technical specs and the most expert pizza makers rectify it by controlling the water temperature of the dough. Homemade pizza needs less dough and consequently little heat is created during the mixing process.
- the refrigerator: the refrigerator is the all-important appliance for storing food. Commercial refrigerators are large and high-performing products often going hand in hand with cold rooms. The fridge is key to the maturation of the dough as the cold slows down fermentation and stops it altogether at 40°F thus lengthening dough development (leavening and maturation are two distinct processes as you can read in this article).
- the oven: the oven is the core element of a pizzeria. Wood-fired, gas-fired or electric provided that it can provide high-grade performance. The wood-fired oven reaches very high temperatures (900°F) and gives food its characteristically smoky flavor. Gas-fired and electric ovens can’t achieve such high temperatures (pizza is usually cooked at 600°F) but they have the advantage of being more practical (they don’t have to be fed with firewood and can be cleaned up in a jiffy).
Home ovens barely reach 500°F even though the latest models can achieve 600°F with a function for baking pizzas.
4 ways to make a homemade pizza like a pro
Let’s take a look at how to make pizza in a few steps. For every step we will highlight the differences between a homemade and a restaurant pizza and, incidentally, we will give you some tips to improve the finished article.
- The pizza dough
There’s no perfect pizza dough recipe or to be precise the best pizza dough is the one that goes well with the other elements necessary to its creation: temperature, time and a good hand:
- Dough, fermentation and oven temperatures are crucial for a successful pizza.
- Time to make dough, to let it rise, to spread it and to bake it.
- A good hand to knead it, to divide it and to stretch it.
Remember that behind a good pizza dough recipe there are always choice, fresh ingredients.
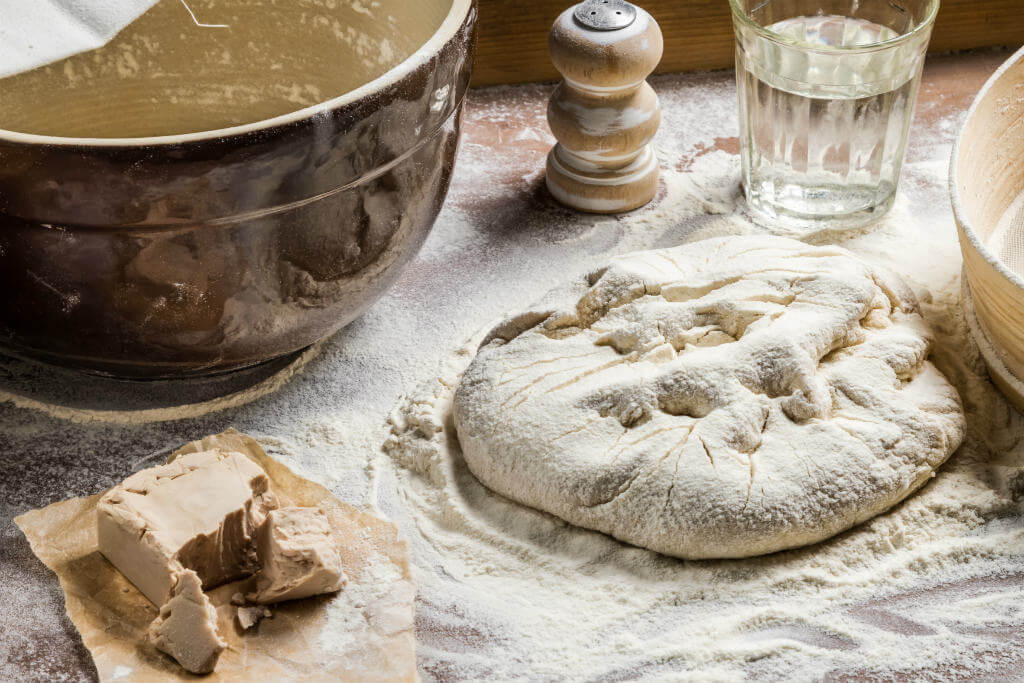
Originally, pizza was a humble food for the poor that shared its ingredients with bread: flour and water. Using a bad water or a low-quality flour can easily hold up your efforts to make a great pizza. For example, tap water is not the best choice if it is hard or contains too much chlorine because it may impact the development of yeast (in this case opt instead for bottled mineral water). As far as flour is concerned, you are really spoilt for choice. Currently many mills produce specialty flours that until a few years ago were targeted at professionals and were hard to come by for the general public. In addition, many producers have taken advantage of Internet development to expand their markets by riding on the homemade bread and pizza trends without considering that these days even convenience stores carry a wide assortment of flours.
To make a homemade pan pizza we suggest using Italian Tipo “0” wheat flour with a strength (W) between 250 and 310 and a 10-12% content of proteins. Pan pizza dough requires a hydration of more than 20% than that of the common pizza dough. Pound for pound, a strong flour absorbs more water than a weak one and needs more time to mature. For that reason, you should slow down rising by resting the dough into the fridge and align dough maturation and fermentation times.
According to the commutative property in math, changing the order of factors doesn’t change the product but pizza making is not math and changing the order of the ingredients does affect the result. Before anything else, keep salt and yeast away because salt can kill yeast. Then add some sugar or honey to feed the yeast. A modicum of sugar won’t change the pizza flavor and it will on the contrary allow the dough to rise well and result in a soft pizza with crispy edges.
There are two ways to mix the ingredients:
- Dissolve the yeast into the water, then add half the flour, the sugar and mix. Keep mixing while adding the rest of flour, finally incorporate extra virgin olive oil and salt.
- Mix yeast and flour, add half of the water and sugar and stir. Keep mixing, gradually add the rest of water and finally extra virgin olive oil and salt.
When the ingredients are well blended, put the dough onto a flour-dusted work surface and knead it until smooth. Let it rest for 10 minutes covered with a wet cloth or Saran wrap. Divide it into equal-sized balls: each of them will be a pizza. The million-dollar question is: how much pizza dough to put into a pan? In this giallo zafferano.it article, the pizza chef Gabriele Bonci did the math for us: area of the pan x 0,6. Hey don’t sweat it, you don’t have to fuss over precision kitchen scales, after all pizza thickness is a matter of taste! If you opt for a rosemary or onion focaccia, we suggest placing a bit more dough in the pan than that normally used to make pizza. A greater thickness prevents focaccia from drying out during baking considering that in this recipe you don’t have toppings that release their moisture to the crust. Now work the dough balls until smooth but don’t over-knead them to prevent gluten from taking too much strength. Then put the dough balls for a few hours in the bottom of the fridge in oiled air-tight containers or covered with a cloth or Saran wrap.
- Stretching pizza dough
Remove the dough of the fridge at least two hours before stretching it. Dust some flour over the kitchen counter and place the dough on it. If you have round pans, the dough balls should weigh between 9 and 10 ounces. Sprinkle some flour over and under the ball and begin to gently stretch it with your fingertips from the middle outwards, widening it into a flat disc. Softly lift the dough to shake off the excess flour and place it onto a greased pan. If you use rectangular pans, use a greater amount of pizza dough and maybe consider using a rolling pin (mum’s the word, so don’t tell it to a pizza chef!). Stretch the dough while flouring both sides of it and once reached the size of the pan, place it onto the pan giving it a flick to remove the surplus flour. Now you can let the pizza rise a third time in the pan before topping it. As already mentioned, rising times depend on so many factors and much perseverance but there’s nothing you can’t master with some practice.

- The topping
Now you can top your dough. Don’t put all the pizza toppings at the same time but treat each of them as a separate thing. First cook a red or white dough for half the cooking time, keeping in mind that most toppings don’t bake in the same time of the crust. So, for the pizza bianca precook the crust brushed with extra virgin olive oil and a pinch of salt. For the pizza rossa, prepare the sauce by cooking the tomato passata in a saucepan with a drizzle of extra virgin olive oil, salt and oregano for about ten minutes and spread the sauce on top of the crust. The dough will be baked in five minutes and by that time you can put all your toppings save the mozzarella that will be added in the last two minutes. Before that, mozzarella must be sliced and drained for an hour, two if it’s buffalo mozzarella, to prevent it from releasing too much water during cooking.
- Baking pizza
Follow these tips to cook a restaurant pizza at home:
- Preheat the oven at full blast for at least an hour on the conventional oven setting.
- Place the pan on the very bottom of the oven
- Use a pizza stone (or a top-notch refractory oven) that retains and releases heat to the pan more efficiently.
- Check the pizza bottom by using a fork to lift it from the pan. If it’s undercooked, remove the pizza from the pan and place it on the stone; if, on the contrary, the bottom is done but the toppings are undercooked, put the pan on the top rack and turn on the grill.
The definitive tips for making pizza like a pro.
Many factors contribute to making as good a homemade pizza as that of a restaurant. Here are four tips for producing some succulent pizzas:
- Choose high-quality ingredients
- Make dough again and again until you get the knack of it. Find the right balance between fermentation and maturation times.
- When stretching pizza dough, work it gently but quickly.
- Find out how your oven works.
If you are rather good at pizza making and you want to step up your game maybe you could entertain the idea of upgrading to higher-end ovens. The market has been growing fast lately, and many models of high-performance semi-professional ovens are at your fingertips.
If you have an outdoor area, you could bet on a wood-fired oven to make the real Neapolitan pizza…and of course so much more!
Then, keep us up to date with your progress… and eat pizza!