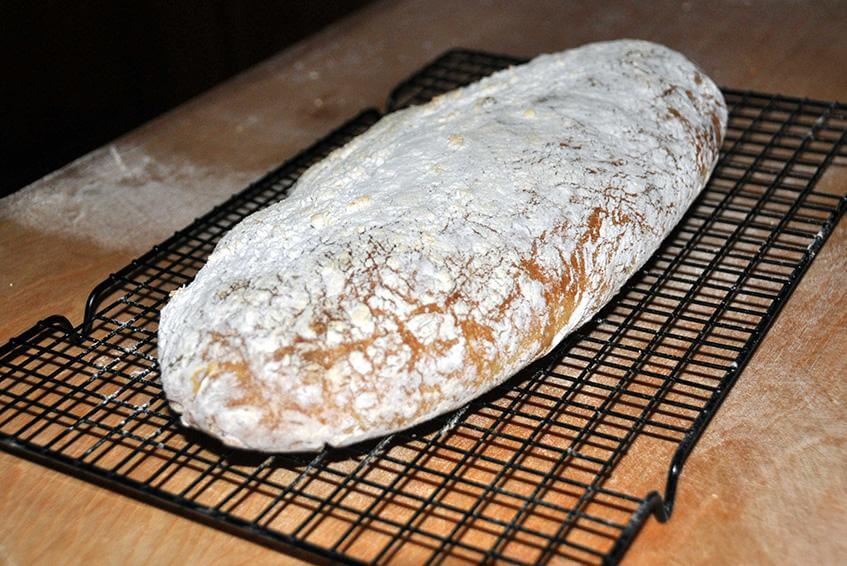
Our friend Vittorio of VivaLaFocaccia this time made a plain Ciabatta bread without the use of a mixer. It is a pretty simple recipe that does not need the use of the mixer. The baking happens, as usual for Vittorio, in an Alfa Pizza home wood fired oven .
- Cooking flame
- Oven temperature: 200/220
Ingredients
- 500 g of all-purpose flour
- 370 g of water at room temperature
- 12 g of fresh yeast (or 5 g of dry yeast)
- 12 g of salt
- 1 teaspoon of honey or sugar
Method
- dissolve the yeast in the water, add the honey (or sugar) and stir;
- add 3/4 of the flour mix;
- add salt;
- stir well to dissolve the salt, add the remaining flour and mix all. No need to mix well, when the flour has been absorbed, the dough is ready;
- cover well and let it leaven for 90 minutes in a place without air drafts at a constant temperature above 25°C (for example in the closed oven with the light on). Let it leaven for 90 minutes or until it has doubled in volume.
Preparation of the oven
- about an hour before baking the bread, light the oven with a heap of paper and small pieces of wood. At first take a little more time to avoid the risk that the bread is leavened and the oven is still too hot;
- add 5-6 pieces of medium sized wood. When the fire has lighted up well, half-close the door so that enough air passes to feed the flame retaining the heat. At this stage, we try to heat the oven while we create the embers;
- open the oven door when the temperature exceeds 300 °C. When the embers have formed, move it to one side;
- put a saucepan of hot water near the embers to increase the humidity inside the oven;
- open or close the door to make the oven reach the temperature 220-240 °C;
- you have to try to synchronize the time at which the bread is ready to be formed and when the oven reaches a temperature of 220-240 °C without any flame in the oven, only embers. If there is still a flame, you can always remove the pieces that are still burning
Shaping the Ciabatta
This dough is quite sticky and hydrated. We use the following procedure to shape the Ciabatta and create the classical flour stripping manipulating the pasta dough as little as possible.
- moisten the working table. This will serve to hold the plastic wrap.
- you have two pieces of plastic wrap on the work table;
- sprinkle abundantly and uniformly the transparent film with flour;
- gently reverse the pasta dough in the middle of the flour trying not to bend it;
- grease your fingers and straighten some dough always kindly to give it the shape of a ciabatta
- place parchment paper on a baking tin of adequate dimensions and sprinkle it with polenta flour. The flour creates a thin layer of air under the Ciabatta which permits it to cook well underneath;
- flipping the Ciabatta helps it to create the flour strips and to redistribute the air bubbles in it;
- adjust the shape always very gently;
- at this point the oven must be at least 220 °C
- sprinkle a little bit of vaporized water on the upper surface of the oven to further increase the humidity in the oven. Increase the humidity of the oven serves to keep the surface of the bread moist so that the heat penetrates the bread immediately without forming the crust. In this way, the carbon dioxide contained in the pasta dough expands by heat and increases the growing of the bread. After that, the crust begins to form and the bread is swollen nice. Also, the inside of the bread bakes better. The earlier you pull out the pan, the thicker the crust.
- bake without jolting, far away from the embers;
- half-close the door so as to maintain the temperature;
- bake at 200-200 °C for 35-40 minutes
- here is the Ciabatta is after about ten minutes. Just in case the Ciabatta takes too much color, cover it with a sheet of aluminum foil;
At halfway through the baking, turn the baking tin to make sure the ciabatta bakes evenly. After the first 10-20 minutes, that is, after the bread has developed, if you want you can remove the pan of water. The earlier you remove it the thicker the crust. Remember to let the bread cool on a wire baking rack, so that the air circulates underneath and the moisture does not soften the bread.


